Showing posts with label appetizer. Show all posts

Tuesday, May 5, 2015

EVERYTHING COLOURFUL SALAD


I declare that "Spring is finally here"; I say finally because at last something has bloomed in my garden - tulips. Big day for me since I have been eyeing all the opened tulips in the neighbourhood as I take our dog for his daily walk. "Do they fertilize, do they have better sun exposure or have I bungled up the hardiest of perennials" ? are thoughts that I wrestle with during every outing. So as I proudly took pictures of our first blooms of 2015, I tried not to dwell too much on the fact that my weeds are probably crying out for my attention too.
Pardon the digression, I must get back to my Everything Colourful Salad. What better time than spring to make a salad that is bursting with the colours and flavours of the season. I made this salad on Saturday and we had leftovers for breakfast today with a hard boiled egg. A perfect protein rich salad that is not just easy to make and healthy, it tastes good too. My recipe used the vegetables I had but feel free to substitute. I made a dressing with pomegranate molasses that my dear friend M brought back from Iran. I have also used "Magiun de prune" to make this dressing and it is just as delicious. Now "Magiun" for my non Romanian readers is a plum paste like jam made using a sweet plum variety that is cooked down for up to 10 hours without adding any sugar. The result is a thick, dark purple paste that is slightly sweet and sour. We bought a jar from the local Romanian deli and I must admit I got a real kick out of seeing a label with just one ingredient on it - Plums.
This is the ideal "cut up and pack for a couple of days" salad, add dressing when serving. I layered this is a deep dish and used it over the weekend and the leftovers this morning for breakfast. Put in individual containers to pack into lunch boxes with some dressing on the side. Play with colours, enjoy your salad : >


Skill Level: Easy 
Serves: 4 to 5 

INGREDIENTS:
  • 1 cup cooked quinoa 
  • 2 cups cooked chickpeas
  • 2 medium sized carrots, thinly sliced 
  • 1 red bell pepper chopped into small pieces 
  • 2 stalks celery chopped into small pieces 
  • 11/2 cup chopped red kale
  • 2 tbsp crumbled feta (optional)
  • Salt and pepper to taste
Dressing:
  • 1 tbsp lemon juice
  • 2 tbsp olive oil
  • 1 tbsp pomegranate molasses
  • 1 tbsp  honey
  • 1 tbsp Dijon mustard
  • 3-4 tbsp warm water (the molasses and the honey make it quite thick)
  • salt and pepper to taste 
METHOD: 

  1. Wash and cook quinoa 1/2 cup cooked in 1 cup of water. (I usually cook 1 cup so extras can be added to other salads, soups or used as a side )
  2. Put the cooked chickpeas in a food processor and pulse until it resembles coarse breadcrumbs (if using canned, drain liquid, rinse thoroughly and pat dry before pulsing in the food processor)
  3. Wash and slice carrots, chop pepper and celery. Cut up the kale
  4. To make the dressing add all the ingredients together and mix well until combined. Add water to thin out as needed. Check seasoning
  5. If serving immediately add the quinoa to the vegetables and toss with the dressing. Crumble feta and add if using.




Saturday, April 18, 2015

SAVOURY VEGGIE LOAF


My mission this morning was to make something savoury for breakfast that did not involve eggs. Of course there are hundreds of options if you are Indian but I wanted something that was not labour intensive and quick. I saw this recipe on Pinterest recently on "Tickling Palates" and changed it based on veggies I had on hand. It was better than I hoped and I enjoyed it with a bowl of yogurt. I'm curious to see if this can be gluten free so I have a pot of quinoa cooking as I write. Look on our facebook page for results and a picture of the quinoa version if it works out. 

I am sure you can change this around based on what you have in your fridge; try peppers, mushrooms, kale, spinach or grated beets. The loaf was moist, flavourful and easy to make. Do not exceed 1 cup of loosely packed zucchini because it will make the loaf too moist and difficult to cut without crumbling. This would be great as a mini muffins which would make it more portable. I'd love to hear back if anyone tries this. 

SKILL: EASY
SERVES: 4 - 6


INGREDIENTS

  • 1 cup semolina (cream of wheat)
  • 1 cup of yogurt (I used 2% fat)
  • 1 cup grated carrots
  • 1 cup grated zucchini
  • 2 green onions finely chopped
  • 1 tsp grated ginger
  • 1 green chili deseeded and chopped finely
  • 1/4 tsp turmeric powder
  • 1/4 tsp cayenne powder
  • 1/2 tsp salt
  • 1/2 tsp baking soda
  • 1 tsp sesame seeds
TEMPERING INGREDIENTS
  • 3 Tbsps coconut oil (or any cooking oil)
  • 1 tsp mustard seeds
  • 1 tsp cumin seeds
  • 2 Tbsp finely chopped curry leaves (optional)

METHOD


  1. Grease a loaf pan and set aside. Preheat oven to 350 degrees F
  2. Add the semolina and yogurt to a bowl, mix well
  3. Grate or finely cut vegetables and add to the yogurt mixture. Add the chili, ginger and seasoning. DO NOT ADD BAKING SODA YET
  4. Add oil to a saute pan. When oil is hot, add the mustard seeds; after it pops, add the cumin  and allow it to sizzle then take the pan off the heat. Add the curry leaves if using. Allow this to cool slightly before adding it to the semolina mixture
  5. Stir well. Mixture will be thick depending on the moisture in the vegetables used
  6. Add the baking soda and mix well. Pour into the batter into prepared loaf pan and bake for 30 -35 minutes
  7. Allow to cool completely before cutting
  8. Serve warm 


Friday, April 10, 2015

MIXED BEAN AND KALE SOUP


The weather the last few days has been up and down, just when you think you can pack away your winter stuff, it's chilly again. And of course the quickest way to bring on snow has got to be by packing up your winter boots. That's precicely what happened over the Easter weekend. I put away our heavy winter boots on Friday and Saturday night it snowed with a fair amount of accumulation. There is our dog running around the deck confused after all these snow free days. Maybe it was not packing away the boots as much as it was using our BBQ for the first time this year a few days ago. 

Cold weather begs for a warm bowl of soup and what better choice than protein and nurient dense legumes and kale. This one pot, ok really two pot meal because I sauteed onions, garlic and ginger before adding it to my instant pot (electric pressure cooker) was ready in half an hour. 

This tastes even better the next day. So make a pot and maybe the soup can chase away the cold days


SKILL: EASY
SERVES : 3 - 4

INGREDIENTS


  • 1 cup of bean and barley soup mix soaked for 3 hours (what I used looked like in this picture, you can also mix up your own)
  • 1 large onion sliced
  • 2 cups of chopped kale
  • 2 bay leaves
  • 10 - 12 cloves of garlic finely chopped
  • 2 inch piece of ginger chopped
  • 1 vegetable boullion cube
  • 1/2 tsp turmeric powder
  • 1/4 tsp black pepper
  • 1/2 tsp cayenne pepper
  • 2 tsp salt
  • lemon juice to taste
  • 4 - 5 Tbsp olive oil
  • 4 cups water

METHOD


  1. Saute onions and ginger to 2 Tbsp of olive oil to a hot pan. Add bay leaves
  2. Drain soaking water from the soup mix and add it to the onions and stir
  3. Season with pepper, salt, cayenne and add vegetable bouillon cube
  4. Add finely chopped kale to the pan and pour in 4 cups of boiling water
  5. Transfer to the instant pot if using or reduce the heat, cover and simmer till the barley and beans have been cooked. I have used a pressure cooker as well for two whistles.
  6. While the soup is boiling, heat the remaining olive oil in a saute pan; add the chopped garlic and turmeric and fry until slightly dark and fragrant
  7. Garnish with fried garlic and add lemon juice to taste 


Monday, April 28, 2014

Nutty Eggplant Dip

It feels like spring is trying really hard to show itself. We are at the end of April and my tulips are mere leaves with the promise of flowers sometime in the near future. In the hopes that seeing patio furniture would change the weather, we brought out our BBQ and deck chairs over this weekend, but it did not work - the temperature today is a mere 10 degrees C/50 degrees F. But, since the BBQ is ready, I put on some eggplant and garlic and decided to make a dip that I saw in Canadian Living recently. The dip is light and has a good blend of flavours and is smple to make. One of these days, (hopefully real soon), the weather will be warm and when you sit out on the deck with a cold beer, this will be an appetizer to try with pita or crackers, but for now, let me go and put away my patio chair cushions since they are calling for rain tonight and tomorrow.
Happy spring !!!

Skill Level: Easy
Serves: 6 - 8

INGREDIENTS:
  • 1 cup walnuts soaked in water for 8 hours (this makes the walnuts less astringent)
  • 1 can chickpeas (540 mL)
  • 1 clove of garlic grilled
  • 2 large eggplants grilled
  • 1/4 cup + 2 Tbsp lemon juice
  • 3/4 tsp salt
  • 1/4 tsp red chili powder
  • 1/4 tsp black pepper powder
  • 1 tsp za'atar powder *
  • 4 Tbsp Tahini
  • 2 Tbsp chopped clilantro or parsley
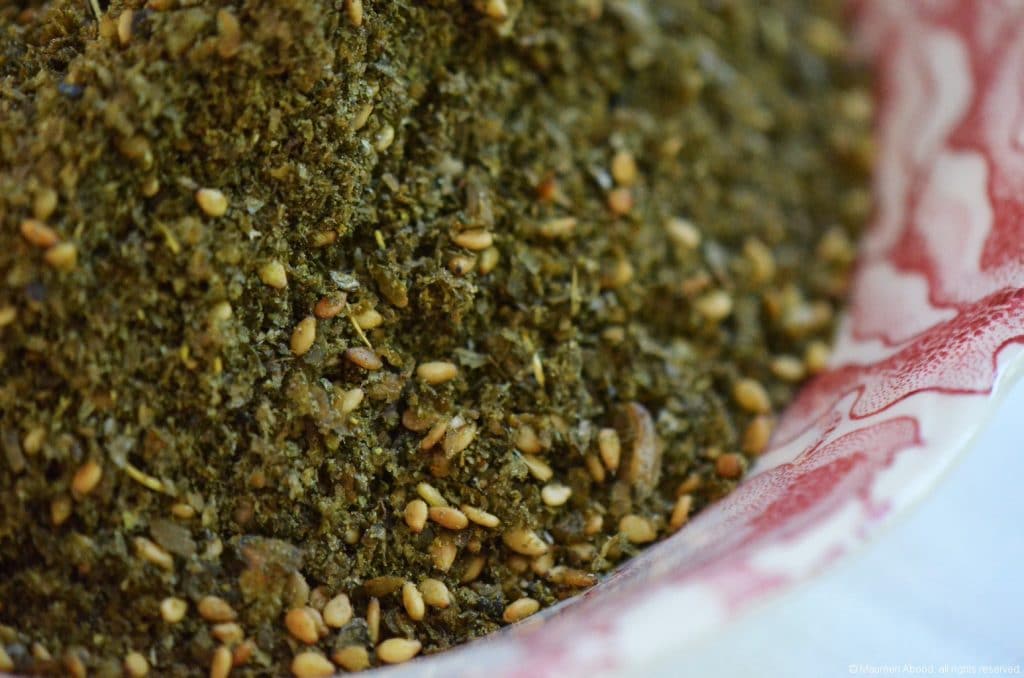
*Za'atar is a Middle Eastern seasoning made using ground thyme, oregano, marjoram, salt, sumac and toasted sesame. Available in Middle Eastern stores but is easy to make at home by combining the following:
  • 1/4 cup sumac
  • 2 tablespoons thyme
  • 1 tablespoon roasted sesame seeds
  • 2 tablespoons marjoram
  • 2 tablespoons oregano
  • 1 teaspoon salt
Mix all ingredients together. Store in an airtight container for up to 6 months


METHOD:

1. Wash and dry eggplants. Pierce the eggplants and place on the BBQ and grill until soft. Remove and allow to cool
2. Cut the top of a clove of garlic and wrap it in foil and grill for approximately 15 minutes. Cool before using
3. Drain water from the walnuts and spread onto a cookie sheet and bake for 15 minutes at 300 degrees F turning once until they are dry and toasted
3. Cut and scoop out the eggplant and put into the food processor, add the drained and rinsed chickpeas, and peeled garlic and mix until it is well belended.
4. Add toasted walnuts, lemon juice, tahini, spices and salt and pulse until it is mixed
5. Refrigerate for an hour. Garnish with cilantro and serve with pita or crackers


Wednesday, February 5, 2014

Quinoa Corn Muffins


Ah, winter, this season keeps on giving and giving with no real end in sight. But this post is not going to start with a lament about too much snow, rather, I'd like to acknowledge our incredible neighbours. These generous souls will brave the winds and the low low temperatures and while clearing up their driveway will clear up ours as well. With their two teens in tow, B & A  have all hands on deck and generally by the time we suit up and get outside, are cheerfully piling up snow left and right. When we tell them that we can take over and finish up they often say, "No, the more the merrier." The only thing merry according to me is their wonderful spirit. So, here's to neigbours who warm your heart despite the frigid temperatures outside - To B & A and their wonderful teens. Thank you!
You remember my mushroom soup from last night? well, we had them with these gluten free quinoa muffins. Recipe courtesy of my sister and mum with alterations made when I realized I had forgotten to pick up zucchini and used cream style corn instead. I added chili flakes for heat and jalapeno pepper for the same reason. Delicious when warm, not bad cold either.

Skill Level: Easy
Makes : 18 regular muffins or 45 mini muffins

INGREDIENTS:

  • 2 cups cooked quinoa (1 cup quinoa cooked with 1 3/4 cups of water or chicken brothe)
  • 3 eggs
  • 1 can 380g cream style corn or 1 cup zucchini grated (see note above)
  • 1 cup shredded mozarella or cheddar cheese
  • 3 Tbsp grated parmesan
  • 3/4 cup ham diced
  • 2 Tbsp chopped parsley
  • 1/2 cup chopped green onion
  • 1/4 tsp salt
  • 1/4 tsp red chili flakes
  • 1/2 jalapeno pepper finely chopped


METHOD: 

1. Cook quinoa and set aside to cool

2. Preheat oven to 350 degres F and line muffin pans with paper or silicon cups

3. In a large bowl add all the ingredient except the quinoa, mix well and then add quinoa and combine until well mixed

4. Using an icecream scoop, fill the mixture into the prepared muffin trays. I had enough for one large tray of 12 and a smaller tray with 6 muffins

5. Bake for approximately 20 - 22 minutes, until edges are golden brown. Turn off the oven and leave the muffins for an additional 5 minutes. A toopick inserted into it should come out clean. 

6. Transfer to a wire rack and cool. Eat while warm. 

Monday, November 25, 2013

Moth bean with buttercup squash


As the weather gets colder, we've been having a lot of soup. This year my squash of choice has been the buttercup variety. I had half a baked squash left over from the weekend and wanted to try incorporating it with some kind of bean - and moth bean with buttercup squash was created. I bought Moth Beans recently for the first time, mostly because I was curious about the this odd sounding, tiny bean. Looking it up, I found that it is pronounced Moat not Moth despite the spelling, is also known as Turkish gram and is called Matki in Hindi. 
This small, slightly longish bean is tan on the outside and brownish yellow on the inside. It has a nutty flavour and an earthy odour. Moth beans are available at Asian grocery stores or in the international aisles in large grocery chains. You can substitute with mung or adzuki bean. This high protein dish can be eaten as a snack or a meal. Serve with flatbread or rice.

 Skill Level: Easy
Serves: 4 - 

INGREDIENTS:
  • 1 cup moth beans (soaked for a min of 3 hours or overnight 
  • 1 medium onion sliced
  • 2 cups baked buttercup squash     (approx. 1/2 )
  • 1/2" piece of ginger grated
  • 4 garlic cloves
  • 2 dry red chilli
  • 1/8 tsp cumin whole
  • 1/8 tsp nigella * seeds
  • 1/8 tsp fennel seeds
  • 1/8 tsp mustard seeds
  • 1/8 tsp fenugreek seeds
  • 1 large tomato chopped
  • 1/4 tsp turmeric powder
  • 1/4 tsp cayenne
  • 1/2 tsp salt
  • 1/4 tsp black pepper powder
  • 1/2 tsp cumin powder
  • 2 T coconut oil
* Nigella seeds look like black cumin seeds, they are part of a group of 5 whole spices called paanch pooran used in Indian cooking. 

METHOD: 
  1. Wash and soak moth beans for a minimum of 3 hours or overnight
  2. Drain water; bring 3 cups of water to a boil and add garlic and moth beans to the pot
  3. Boil until soft, drain but reserve 1/2 a cup of the liquid
  4. Put oil in a saucepan and add the dry red chilli, cumin, nigella, fenugreek and mustard seeds, allow them to brown a little until fragrant. Add onions, saute until transparent
  5. Cube the baked buttercup squash and add to the onion mixture, stir gently to keep the squash intact
  6. Add chopped tomato, turmeric, cayenne, salt, pepper and cumin powder
  7. Put the drained moth beans to the onion quash mixture, add in the reserved liquid and mix. 
  8. Cover and cook on low heat for 10 minutes. Check seasoning. This dish is dry with very little liquid

Tuesday, October 29, 2013

Pickled Peppers


In my previous post, I mentioned that we recently made zacusca and since we had lots of peppers left over, we decided to pickle the peppers. So that evening, after putting away the jars of zacusca, we rummaged for large 1.8L jars so we could use them for the peppers. Fortunately some were short and curly so we were able to sort them and fill them in. Many vegetables can be pickled, I have done cauliflower, carrots and baby cucumbers before. The method is the same - wash and dry the vegetable, put them in jars and pour the liquid in the jars and leave it for a few weeks before consuming,

Skill Level: EASY
Makes 

INGREDIENTS:

  • 1 cup water
  • 5 cups apple cider vinegar
  • 4 T coarse salt
  • 10 bay leaves
  • 20 black peppercorns
  • 20 sweet long red peppers

METHOD:

1. Wash the peppers and pat them dry with a paper towel. Do not use bruised peppers

2. Wash and dry glass jars
3. Arrange peppers loosely into jars, divide bay leaves into the jars

4. In a pot, bring water, vinegar, salt and peppercorns to a boil

5. Carefully pour the hot vinegar solution into the jars, making sure to leave a 1 inch head space

6. Spoon in peppercorns into each jar

7. Close the lid tightly and store in a cool place for about 2 weeks before using

8. Opened jars must be refrigerated

Zacusca (Red pepper and Eggplant Spread)


Fall is a time of such abundance and there is no place better than a farmers market to enjoy all the bounty of this season. One of our favourite markets is in Southern Ontario - Saint Jacob's Farmer's Market http://www.stjacobs.com/farmers-market, open year round, there is a much to see and lots of local products to savour at this market. Once we are done shopping, our next stop is usually to Anna Mae's in Millbank for their broasted chicken http://www.annamaes.ca. Highly highly recommend both the market and the chicken (I'm sure the other stuff on the menu is good but we've never had anything but the chicken in the 15 years since we've been going there).

This year, we bought bushels of eggplant, sweet long red peppers and tomatoes because I really wanted to try my hand at making zacusca which is a Romanian dip. I am certainly not entering the minefield of where this spread originated because I am sure that similar spreads are found in all Balkan countries. Since my husband is Romanian, my mother in law was the perfect person to recruit for this mission; between her, my husband and I, we grilled, peeled, chopped and stirred for a few hours until my mission was accomplished.


The preparation is time consuming, but it yields several jars of finished product so you have some to keep and enough to share with friends and family. It is best refrigerated once opened and should be used up in 3-4 months.

Zacusca is delicious on bread or crackers with
some olives, feta or goat cheese. I had enough for 12 mason jars of 250 mL each (see picture) and about 3 jars of 1 L each.

Skill Level: Time consuming, involves a lot of stirring
Makes : Approx. 6 L

INGREDIENTS:
  • 16 medium sized eggplant (grilled and peeled)
  • 20 long sweet red peppers (grilled and peeled)
  • 10 long sweet red peppers (finely chopped)
  • 8 medium sized onions (finely chopped) 
  • 10 medium roma tomatoes (pureed)
  • 1 L sunflower oil
  • 4 Tbsp salt
METHOD:

1. Grill eggplant and peppers. We used the BBQ, but the oven would work just as well. Grill until the eggplants and peppers are soft but not charred. Wait until it is easy to handle and peel the skin under running water. 

2. Puree eggplant, peppers, onions and tomatoes and set each aside separately. Do not worry if you cannot remove all the pepper seeds it adds to the visuals of the spread

3. In a large soup pot, pour 2 cups of oil and add the bay leaves and peppercorns

4. Add the chopped onions and stir for 3-5 minutes

5. Add the eggplant and peppers to the pot

6. Add salt and stir continuously so it does not stick to the bottom of the pot 

7. Add 2 more cups of oil and continue stirring. Check and adjust salt as needed

8. After approximately an hour when some of the liquid has reduced. Add the pureed tomatoes

9. Continue stirring; when the oil rises to the sides of the pot, zacusca is done

10. Hot fill into glass jars, close tightly. Some oil may rise to the surface, stir in before serving 

Thursday, October 10, 2013

Cobb salad


Life sometimes interferes with the best of intentions and I find myself back at the blog after a fairly long interval. My deepest thanks to my blog partner (and her husband) who despite having had a baby last year, managed to keep on posting while raising their son and dealing with his food sensitivities. No excuses, I am back now. 
I spent the last several weeks in Portland, Oregon with my sister and her family. Several years ago my sister took me to a restaurant in downtown Portland where I had a Cobb salad that has since become my most favourite salad. Every time I visit Portland we have a Cobb salad date during the course of my trip and this year was no exception. 
Cobb salad is an American classic, said to date back to the 1930s when Robert Cobb owner of the Hollywood Brown Derby restaurant, put together leftovers to make the salad that bears his name. I've seen many variations of the Cobb Salad on menus over the years; I used corn in the one I made last night and have used roasted chicken breast when serving friends who do not eat bacon. Get creative and enjoy.
The picture above that is beautifully layered is from the restaurant, my more humble version is shown below.

Skill Level: Easy
Serves: 4 

INGREDIENTS:

Salad
  • 2 cups chopped iceberg lettuce 
  • 1 ear of corn (shaved off the cob and sauteed with one tsp of olive oil, until slightly charred)
  • 8 strips of bacon cooked and crumbled
  • 1 avocado chopped
  • 4 hard boiled eggs chopped
  • 2 medium tomatoes chopped 
  •  1/2 cup crumbled blue cheese
Salad Dressing

  •  1/4 cup water
  • 1/4 cup red wine vinegar
  • 1 1/2 teaspoons lemon juice
  • 1/2 teaspoon each salt and black pepper
  • 1/2 teaspoon Worcestershire sauce
  • 3/4 teaspoon Dijon mustard
  • 1/2 clove garlic, minced
  • 1/2 cup olive oil
METHOD:

1. Put all the ingredients of the dressing in a bowl and set aside
2. Assemble the salad ingredients (layered in a bowl, laid out on a plate or stacked as in the picture)
3. Drizzle dressing as required on the salad.

Sunday, February 10, 2013

Sweet buns


Today is Chinese New Year and although I am not Chinese I have friends who are. After the record breaking snow day we had on Friday (February 8, 2013) today seems like a good day to celebrate. Happy New Year friends!

On the menu at our place today is Crab curry and baked sweet buns. Mum is the architect of both. I will start with the sweet buns and follow with crab curry since to put it all in one recipe may discourage you from trying it based solely on the length of the recipe. This sweet bun is actually called bierocks. Bierocks is a traditional German dish made out of bread rolls that are stuffed with ground beefm onions and cabbage. They freeze very well - just wrap each bun individually in foil and put them in a freezer bag; when you are ready to eat just thaw them in the fridge then place foil wrapped bun in a preheated (350 F) oven for 15 minutes. Ideal for picnics, long trips and kid's lunches, these can be stuffed with anything you choose - mixed vegetables, cheese, shrimp, ground meat and can be as delicious snack or a meal if paired with soup or in our case eaten like dinner rolls with crab curry. 

And my Chinese twist to this is that it looks rather similar to Cha Shao Boa buns. I am not sure how those are made but they look similar to what you can find at Chinese bakeries where you get a multitude of buns and rolls stuffed with anything from sausages to BBQ pork to coconut. Enjoy ! 


Skill Level: Easy
Serves: 12

INGREDIENTS:
  • 1/4 cup sugar
  • 2 1/4 tsp (one packet) yeast 
  • 1/2 cup warm water
  • 1/2 cup low fat milk  
  • 1/4 cup vegetable oil 
  • 3/4 tsp salt
  • 2 large eggs lightly beaten
  • 4 cups all purpose flour
For brushing the tops of buns
  • 1 egg lightly beaten
  • 1 Tbsp water
METHOD: 
  1. Dissolve sugar and yeast in warm water and alow it to stand for 5 minutes
  2. Stir in milk, salt, oil and eggs
  3. Add 3 1/2 cups of flour to yeast mixture and stir to form a soft dough
  4. Turn dough on a lightly floured surfce, knead until smooth and elastic (aprox. 8 minutes)
  5. Add the remaining flour, one Tbsp at a time (until dough does not stick to your hand) 
  6. Place dough in a large bowl coated with oil; turning to coat both sides. 
  7. Cover and let it rise for 1 hour (dough must be doubled in size) 
  8. Gently press two fingers into the dough, if the indentation remains then the dough has risen enough.
  9. Punch down dough, cover and let it rest for 5 minutes
  10. Divide dough in half and roll each half into a rectangle on a lightly floured board
  11. Cut each rectangle into 6 squares  
  12. If you are doing this with a filling - place filling in the centre and pinch sides together to join. Place seam side down
  13. Roll into a ball, cover and let it rise for an additional 20 minutes
  14. Uncover and glaze the tops of the buns with egg mixture using a basting brush, 
  15. Place on a cookie sheet and bake at 350 F for 15 minutes 

Tuesday, January 8, 2013

Mutton cutlets


Happy New Year!  I hope you all had a lovely Christmas & New Year's eve surrounded by family and loved ones. Our blog is a year old and what a year it has been - many milestones and reasons to celebrate. This year, we hope to make our blog better and welcome your comments and feedback so we can grow and improve.

Over the holidays, my mum and I made several appetizers some new, others old favourites. This one is a simple recipe for mutton cutlets. You can use pork, beef or chicken. These are great to make and freeze and can be thawed out run through an egg wash, dipped in breadcrumbs and shallow fried in oil just before serving.


Skill Level: Easy
Serves: 6 - 8

INGREDIENTS:
  • 1 lb ground lamb
  • 4 small onions chopped fine
  • 1 inch piece ginger chopped fine
  • 4 cloves garlic crushed
  • 4 large potatoes boiled and mashed
  • 1 tsp garam masala 
  • 1/2 tsp turmeric powder
  • 1/4 tsp chili powder
  • 2 green chilies chopped fine
  • 1 egg beaten
  • 1 cup breadcrumbs
  • 1 tsp salt
  • 1/4 cup of oil for frying
METHOD: 
  1. Heat a saucepan and add 1 tbsp of oil, add onions, ginger, garlic and chili and saute until onions are transparent
  2. Add meat to the pan and break up large chunks into smaller pieces. Season with salt and spices and stir until meat is cooked
  3. Set aside. Peel and mash boiled potatoes. When meat mixture has cooled, add to the potatoes and mix until combined
  4. Roll into balls and flatten. Size varies according to preference. 
  5. Beat egg with a fork and set aside. Put breadcrumbs in to a bolw. First dip and coat the cutlet in egg and then roll in breadrumbs
  6. When all the cutlets have been made heat oil in a small pan, when the oil is hot, add cutlets to the pan and fry intil golden brown
  7. Serve with hot sauce or ketchup


Sunday, November 4, 2012

Stacked Eggplant with Feta Cheese


Eggplant, as I have previously mentioned, is a family favourite, so I was happy to try out a new recipe that was an instant hit. This works well as an appetizer as you can make the eggplant slices ahead of time and assemble the rest of the ingredients just before serving. Enjoy! 

Skill Level: Easy
Serves: 4 - 6
INGREDIENTS:
  • 1 small eggplant that can be cut into  1 inch slices
  • 1 Tbsp whole wheat flour
  • 1/2 tsp cayenne pepper
  • 1/2 tsp salt
  • 1/2 tsp black pepper
  • 1/4 cup cooking oil ( I used sunflower oil)
  • 1 medium onion sliced
  • 1  cup zucchini cubed
  • 1 cup cremini mushrooms sliced
  • 1/4 cup feta cheese grated
  • 1/2 cup cherry tomatoes cut into half 
  • 1/4 cup breadcrumbs
  • 1/4 tsp dried rubbed oregano
  • 2 Tbsp chopped walnuts  

METHOD:

  1. Preheat the oven to 500 F
  2. Season the flour with cayenne and salt and toss eggplant in the mixture and coat both sides
  3. Heat a 2 Tbsp oil and add the eggplant slices and saute eggplant for 3 minutes per side adding more oil as necessary
  4. Set the eggplant aside on a parchment paper lined tray
  5. Heat a tablespoon of oil and saute the onions, mushrooms and zucchini 
  6. Season with salt and pepper. Turn off heat and add tomatoes
  7. Add breadcrumbs and oregano. Taste and adjust seasoning as needed
  8. Divide the vegetable mixture evenly on top of the eggplant slices, sprinkle walnuts and feta over top 
  9. Bake for 5 minutes before serving