Monday, November 18, 2013

Truffles


Around this time of the year, I am always on the lookout for recipes for my annual Christmas bake exchange. If the recipe has no added sugar, no egg or flour, then it covers most dietary restrictions in my circle of friends. This recipe I found on a blog called 
"An edible mosaic" is a winner. I used a combination of sunflower and pumpkin seeds simply because I did not have enough of the latter, otherwise made no substitutions It is moist and delicious and can be rolled in cocoa, nuts or seeds to have a variety of different looks with one recipe. Thank you to Faith Gorsky Safarini for this one.This recipe is a keeper; in fact, my blog partner's little guy loved it too, so it's thumb's up from a little person in addition to all the adults who tried it. Enjoy!

Skill Level: Easy
Serves: 6 - 8

INGREDIENTS:
  • 8 pitted chopped Medjool dates (approx 4 oz)
  • 4 Tbsp roasted unsalted sunflower seeds
  • 2 T pumpkin puree ( canned is fine, do not use pumpkin pie filling) 
  • 1 T cocoa powder
  • 1 T ground flax seeds
  • 1 t vanilla extract
  • 1 t coconut oil melted
  • 1/2 t ground cinnamon
  • 1/4 t ground nutmeg
  • 1/8 t ground ginger
  • 1 pinch salt
  • 1 pinch ground cloves
TOPPING IDEAS

Desiccated coconut, cocoa powder, sesame seeds, crushed nuts
METHOD: 
  1. Pulse together all ingredients (except toppings) in a food processor until it comes together to form a ball.
  2. Scoop the dough into 1 tablespoon-sized truffles, roll into balls, and then coat in any topping(s) you like.
  3. Store the truffles in an airtight container up to 2 weeks in the fridge.

Sunday, November 10, 2013

Corn and Potato Chowder with Bacon


This is a classic and hearty chowder for the whole family. You may think that chowder is a very difficult soup to make but trust me, it is not a complicated task that requires you slaving your time in the kitchen. I made this chowder out of ingredients that are available at the time. Not to miss bacon! I love adding bacon in my chowder to incorporate in smoke flavour. 

Skill Level:Medium
Serves: 6 - 8

INGREDIENTS:
  • 2 cups chopped leeks, white part only
  • 1 rib celery, sliced
  • 1 can (12 oz) peaches and cream corn, or 1 cup of frozen corn 
  • 1 can ( 14 oz) cream of corn
  • 4 slices bacon, cut into 1/2" length
  • 4 cups 2% milk
  • 1 cup 35% cream 
  • 1 cup chicken broth 
  • 4 potatoes, cut 3 into small cubes, 1 to be shredded
  • 1 tbsp wheat flour 
  • 1 tsp salt
  • black pepper, to taste
METHOD: 
  1. In a pot, sautee bacon slices till crisp with medium heat
  2. Scoopt the bacon on a plate layered with paper towel (to soak up the grease). Drain the fat and leave around 3 tbsp bacon fat in a pot 
  3. With low heat, stir in wheat flour to make a roux (white creamy paste). Stir for 3 to 4 minutes to prevent any lumps
  4. Increase the heat to medium and add in chopped leeks and celery, cook for another 3 minutes
  5. Pour in chicken broth, peaches and cream corn, cream of corn, cubed and shredded potatoes
  6. Stir well and cook till boil. Boil under low heat for 5 minutes
  7. At this time, you can add in milk and cream. Continue to stir. Season with salt and pepper 
  8. Heat through but do not boil. Cook till all vegetables are soft, about 25 minutes 
  9. Serve with crispy bacon bits on top

Tuesday, November 5, 2013

Mango dessert with pomegranate


This is probably the easiest dessert I have ever made, the only thing easier than this would be to open a can of mango puree pour into bowls and hand out spoons ! I even bought a few extra cans to have in store for when I am short on time and have to produce something sweet. Alphonso mangoes are considered to be the best in terms of flavour and sweetness. They have a relatively short growing season and are known to be one of the most expensive varieties of mangoes. Fortunately, they can be found at Indian supermarkets and this year, even large grocery chains in Ontario carried them. The growing season is March to May which means they are not available now, but you can find Alphonso mango puree in cans at Indian grocery stores. 

Skill Level: Easy
Serves: 4 - 6

INGREDIENTS:
  • 2 cups mango puree
  • 11/2  cup low fat cottage cheese
  • 1 Tbsp rose water (found in Indian grocery stores) 
  • 3 Tbsp pomegranate 
  • 1/4 tsp cardamom powder  
METHOD
  1. Put all ingredients except pomegranate and cardamom powder in a bowl
  2. Using an immersion blender, mix until it is a smooth puree 
  3. Refrigerate for 2-3 hours
  4. It will not be cuttable in texture, more like a creamy soup
  5. Before serving garnish with pomegranate and cardamom powder


Chutney Pulao (Pesto Rice)


This past weekend along with the clocks turning back an hour, Hindus around the world celebrated Diwali - the festival of lights - which is considered one of the most important of Hindu celebrations. Generally, small clay lamps (see picture) are lit and fire crackers are burst in order to chase away any bad spirits. This 5 day festival is spent with friends and family, involves a great deal of cooking, sharing of food and the exchange of Indian sweets.
On Diwali we try and observe a vegetarian diet and it gave me a chance to to try a new recipe for pesto rice that had recently tweaked my interest. Contrary to the image that pesto conjures up, this recipe did not call for pine nuts, basil or olive oil. It was easy to make and delicious to eat on it's own.
I am currently using coconut oil almost exclusively in my cooking and I substituted this in place of the oil or ghee the recipe called for and found that it enhanced the flavour. Another substitution I made was to use frozen green chickpeas or hara chana (Hindi) in place of green peas. Hara Chana is found in Indian stores but you can use any kind of beans of peas you have on hand.
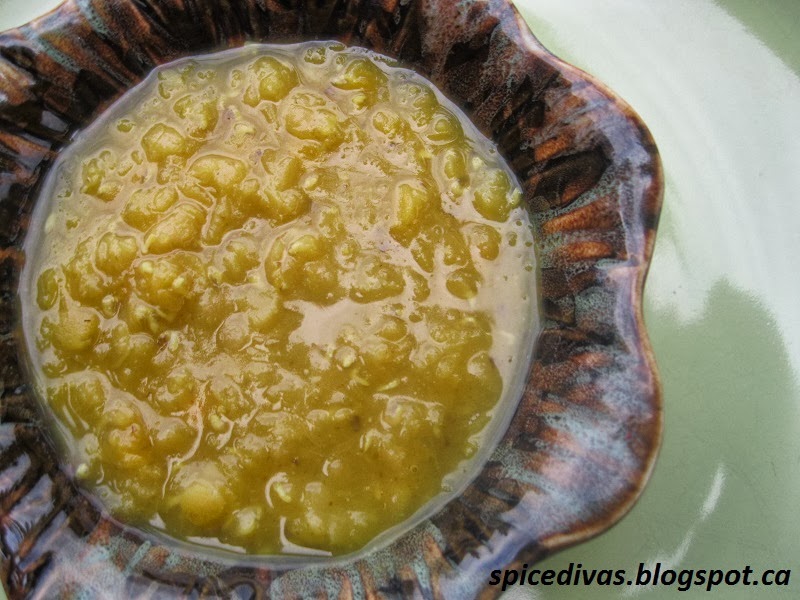
The recipe suggested eating it with something light as this dish is quite rich. So I made dal and Indian Zucchini (recipe to follow). This would be equally good with some baked or steamed fish or BBQ chicken.

Skill Level: Easy
Serves: 2 - 4

INGREDIENTS:
  • 1 cup basmati rice (washed, soaked and drained of water)
  • 1/3 cup desiccated unsweetened coconut 
  • 3 cloves of garlic
  • 1 inch piece of ginger root 
  • 2 cups coarsely chopped cilantro/coriander leaves
  • 1 cup chopped mint leaves
  • 2 T coconut oil
  • 2 green chilli deseeded
  • 12 raw cashew nuts
  • 1 inch piece of cinnamon
  • 4 cardamom pods crushed slightly
  • 4-6 cloves
  • 1 red onion sliced
  • 1 cup frozen green chick peas
  • salt to taste
  • 2 cups of water

METHOD
  1. Wash and soak the rice for 20 minutes
  2. Put the coconut in a bowl and add a 1/2 cup of water, let it sit for 10 minutes
  3. In a food processor add the coconut with the soaking water, chilli, coriander, mint, ginger and garlic and blend until smooth
  4. Add 1 Tbsp of coconut oil to a pan and fry cashews until they are brown, remove, drain and set aside
  5. Add the rest of the oil to the same pan and put in the cinnamon, cloves and cardamom, stir for a minute and then add the onion and saute until transparent
  6. Add the rice, coconut mixture and salt and stir until combined, taking care not to overmix and break the grains of rice
  7. Add the green chick peas and the 2 cups of water, reduce heat to low, cover and cook rice for about 10 minutes
  8. Turn off the heat. Do not lift up the lid, allow rice to continue to cook in steam for another 7-8 minutes
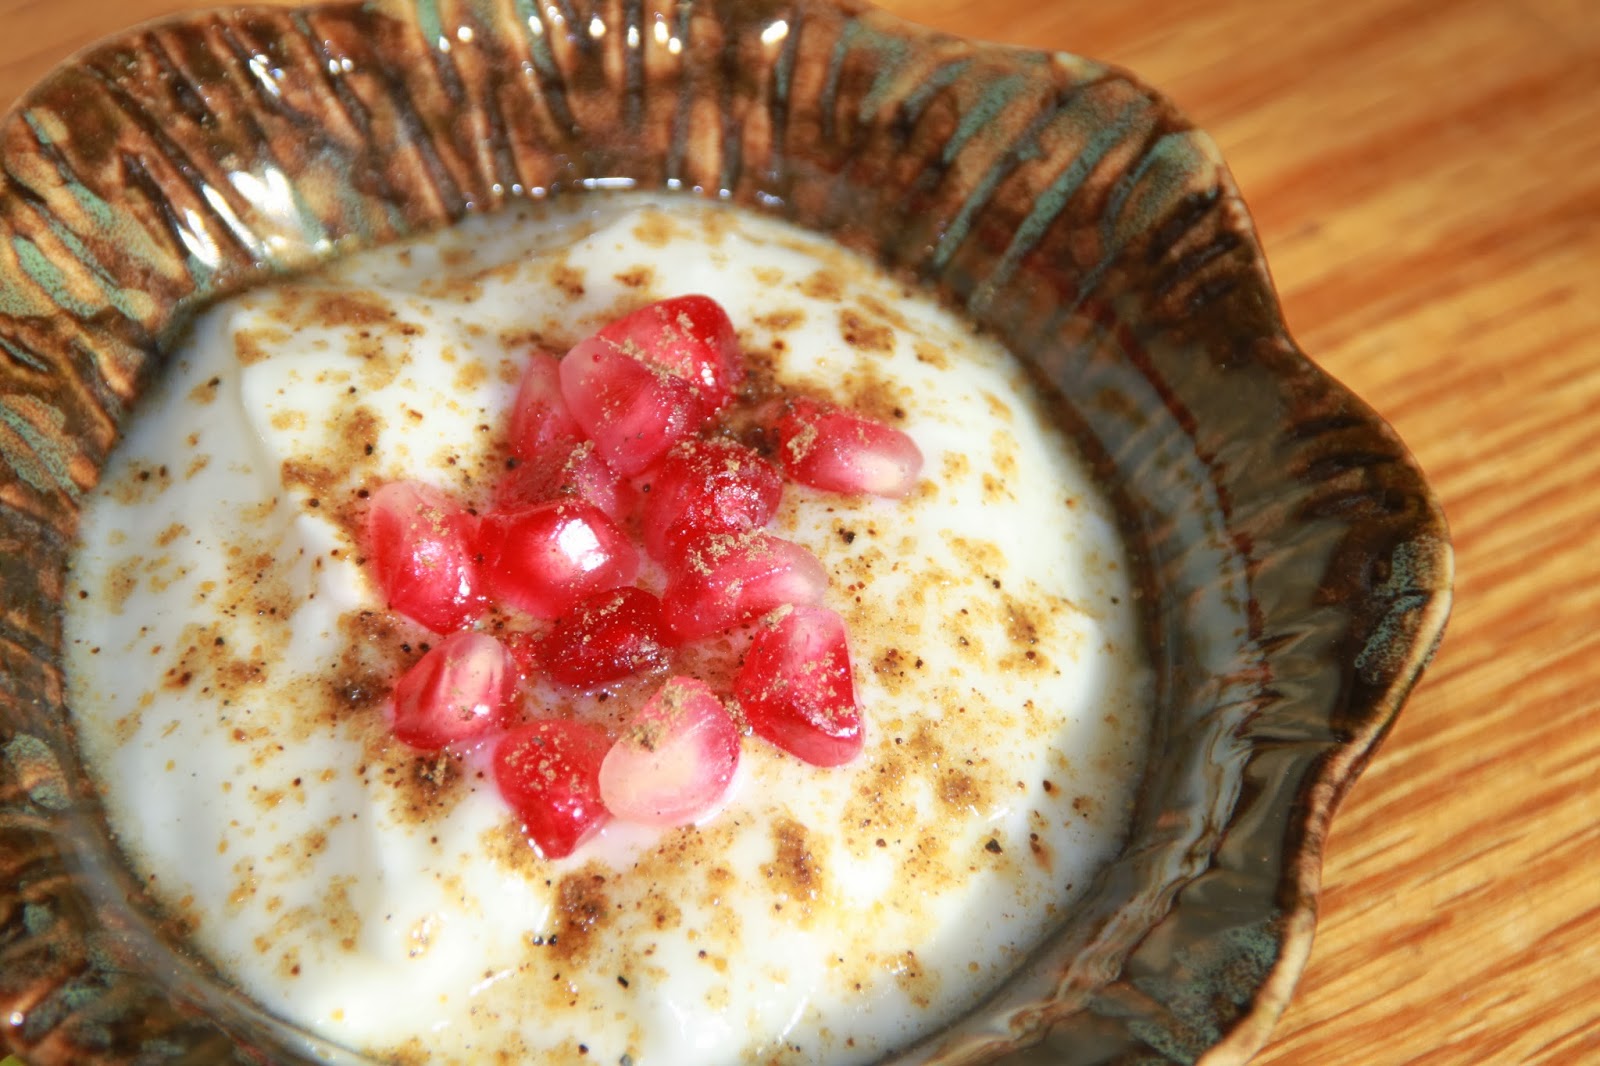
  9. Fluff rice with a fork, add cashews and serve with raita (seasoned yogurt) or chutney. Our raita had pomegranate seeds and a dusting of cumin powder

Tuesday, October 29, 2013

Pickled Peppers


In my previous post, I mentioned that we recently made zacusca and since we had lots of peppers left over, we decided to pickle the peppers. So that evening, after putting away the jars of zacusca, we rummaged for large 1.8L jars so we could use them for the peppers. Fortunately some were short and curly so we were able to sort them and fill them in. Many vegetables can be pickled, I have done cauliflower, carrots and baby cucumbers before. The method is the same - wash and dry the vegetable, put them in jars and pour the liquid in the jars and leave it for a few weeks before consuming,

Skill Level: EASY
Makes 

INGREDIENTS:

  • 1 cup water
  • 5 cups apple cider vinegar
  • 4 T coarse salt
  • 10 bay leaves
  • 20 black peppercorns
  • 20 sweet long red peppers

METHOD:

1. Wash the peppers and pat them dry with a paper towel. Do not use bruised peppers

2. Wash and dry glass jars
3. Arrange peppers loosely into jars, divide bay leaves into the jars

4. In a pot, bring water, vinegar, salt and peppercorns to a boil

5. Carefully pour the hot vinegar solution into the jars, making sure to leave a 1 inch head space

6. Spoon in peppercorns into each jar

7. Close the lid tightly and store in a cool place for about 2 weeks before using

8. Opened jars must be refrigerated

Zacusca (Red pepper and Eggplant Spread)


Fall is a time of such abundance and there is no place better than a farmers market to enjoy all the bounty of this season. One of our favourite markets is in Southern Ontario - Saint Jacob's Farmer's Market http://www.stjacobs.com/farmers-market, open year round, there is a much to see and lots of local products to savour at this market. Once we are done shopping, our next stop is usually to Anna Mae's in Millbank for their broasted chicken http://www.annamaes.ca. Highly highly recommend both the market and the chicken (I'm sure the other stuff on the menu is good but we've never had anything but the chicken in the 15 years since we've been going there).

This year, we bought bushels of eggplant, sweet long red peppers and tomatoes because I really wanted to try my hand at making zacusca which is a Romanian dip. I am certainly not entering the minefield of where this spread originated because I am sure that similar spreads are found in all Balkan countries. Since my husband is Romanian, my mother in law was the perfect person to recruit for this mission; between her, my husband and I, we grilled, peeled, chopped and stirred for a few hours until my mission was accomplished.


The preparation is time consuming, but it yields several jars of finished product so you have some to keep and enough to share with friends and family. It is best refrigerated once opened and should be used up in 3-4 months.

Zacusca is delicious on bread or crackers with
some olives, feta or goat cheese. I had enough for 12 mason jars of 250 mL each (see picture) and about 3 jars of 1 L each.

Skill Level: Time consuming, involves a lot of stirring
Makes : Approx. 6 L

INGREDIENTS:
  • 16 medium sized eggplant (grilled and peeled)
  • 20 long sweet red peppers (grilled and peeled)
  • 10 long sweet red peppers (finely chopped)
  • 8 medium sized onions (finely chopped) 
  • 10 medium roma tomatoes (pureed)
  • 1 L sunflower oil
  • 4 Tbsp salt
METHOD:

1. Grill eggplant and peppers. We used the BBQ, but the oven would work just as well. Grill until the eggplants and peppers are soft but not charred. Wait until it is easy to handle and peel the skin under running water. 

2. Puree eggplant, peppers, onions and tomatoes and set each aside separately. Do not worry if you cannot remove all the pepper seeds it adds to the visuals of the spread

3. In a large soup pot, pour 2 cups of oil and add the bay leaves and peppercorns

4. Add the chopped onions and stir for 3-5 minutes

5. Add the eggplant and peppers to the pot

6. Add salt and stir continuously so it does not stick to the bottom of the pot 

7. Add 2 more cups of oil and continue stirring. Check and adjust salt as needed

8. After approximately an hour when some of the liquid has reduced. Add the pureed tomatoes

9. Continue stirring; when the oil rises to the sides of the pot, zacusca is done

10. Hot fill into glass jars, close tightly. Some oil may rise to the surface, stir in before serving 

Monday, October 21, 2013

Masoor Dal (Red Lentil curry)


Dal or Lentils are a South Asian staple. Rich in protein, B vitamins and virtually fat free, dal is easy to prepare, delicious and can be eaten with roti or naan (flat bread). Comfort food in our house is dal and rice with yogurt, specifically red lentils or masoor dal as it is referred to in India. I remember when we returned home after family vacations, mum would make dal and rice and it was the perfect homecoming. For this reason, my dal preference has always been the red variety although there are several varieties and colours of dal. Since India, Pakistan, Nepal, Bangladesh, Sri Lanka are all dal consuming countries, I am certain you will find several variations of dal recipes. The basics however remain the same - lentils are boiled, spices and seasonings are added and the last step is "thadka"  a garnish which involves oil and aromatic spices
The red lentils in this recipe are found in the international aisle of most supermarkets, so there is no need to go to a South Asian store for them. They come split or whole. Generally, dal is a mild, not spicy dish, however you can always add chili powder if you prefer a pungent dish.


Skill Level: Easy
Serves: 2 - 4

INGREDIENTS:
  • 1 cup of red/masoor dal
  • 1/4 tsp turmeric powder 
  • 1/4 tsp cumin powder
  • 1/2 tsp salt
  • 3 cups water
  • 4 whole garlic cloves
For the tadka/garnish
  • 6-8 curry leaves
  • 1/2 tsp black mustard seeds
  • 1/2 tsp whole cumin seeds
  • 1 - 2 dried red chilies
  • 1 small onion thinly sliced
  • 2 tbsp tomato paste
  • 2 tbsp cooking oil
METHOD
  1. Wash the lentils in water several times until the water is clear
  2. Drain the lentils and put it in a pot. Add the garlic cloves and turmeric and 3 cups of water and allow to come to a boil. Skim off any froth that accumulates on the surface
  3. When it is boiled, it should look like this 
  4. Add salt after it has boiled
  5. In a small pan, add oil, when it is hot add the curry leaves, mustard, cumnin and red chilis. ATTENTION: The mustard seeds will splutter, careful not to get any on your face and hands! Reduce the heat and make sure the ingredients do not burn
  6. Add onion and saute until transparent, add the tomato paste and cook for 2-3 minutes until onions, spices and paste have mixed well
  7. Add the tadka to the boiled dal and check seasoning. 
  8. If you find this too thick, add 1/2 a cup of water to thin it out; the thickness depends on if you are eating this with bread or rice 


Thursday, October 10, 2013

Cobb salad


Life sometimes interferes with the best of intentions and I find myself back at the blog after a fairly long interval. My deepest thanks to my blog partner (and her husband) who despite having had a baby last year, managed to keep on posting while raising their son and dealing with his food sensitivities. No excuses, I am back now. 
I spent the last several weeks in Portland, Oregon with my sister and her family. Several years ago my sister took me to a restaurant in downtown Portland where I had a Cobb salad that has since become my most favourite salad. Every time I visit Portland we have a Cobb salad date during the course of my trip and this year was no exception. 
Cobb salad is an American classic, said to date back to the 1930s when Robert Cobb owner of the Hollywood Brown Derby restaurant, put together leftovers to make the salad that bears his name. I've seen many variations of the Cobb Salad on menus over the years; I used corn in the one I made last night and have used roasted chicken breast when serving friends who do not eat bacon. Get creative and enjoy.
The picture above that is beautifully layered is from the restaurant, my more humble version is shown below.

Skill Level: Easy
Serves: 4 

INGREDIENTS:

Salad
  • 2 cups chopped iceberg lettuce 
  • 1 ear of corn (shaved off the cob and sauteed with one tsp of olive oil, until slightly charred)
  • 8 strips of bacon cooked and crumbled
  • 1 avocado chopped
  • 4 hard boiled eggs chopped
  • 2 medium tomatoes chopped 
  •  1/2 cup crumbled blue cheese
Salad Dressing

  •  1/4 cup water
  • 1/4 cup red wine vinegar
  • 1 1/2 teaspoons lemon juice
  • 1/2 teaspoon each salt and black pepper
  • 1/2 teaspoon Worcestershire sauce
  • 3/4 teaspoon Dijon mustard
  • 1/2 clove garlic, minced
  • 1/2 cup olive oil
METHOD:

1. Put all the ingredients of the dressing in a bowl and set aside
2. Assemble the salad ingredients (layered in a bowl, laid out on a plate or stacked as in the picture)
3. Drizzle dressing as required on the salad.

Thursday, September 19, 2013

Sauteed Japanese Pumpkin (Kabocha) and Bitter Melon


How time flies and I have been back to work for more than a month now. The transition was challenging at first but now, both my son and I have adjusted well. 

I happened to make this stir fry when I found a left-over Japanese pumpkin (Kabocha) in my fridge. Out of all pumpkins/squashes, this is probably the best one! It is sweet, buttery and simply best when roasted. 

I bought this buttery pumpkin to create a "mock" macaroni and cheese for my 1 year old son. My son is suffering from eczema and has various food sensitivities/allergies. Prior to knowing his allergies, he liked macaroni and cheese. Unfortunately, dairy is no longer part of his diet so I stumbled across a website sharing recipe for a "mock" macaroni and cheese using this pumpkin. As you are aware of, one year old's appetite is not as much as ours. I have more than 3/4 pumpkin left in the fridge and was thinking to make curry. But then, I found Chinese bitter melons in the fridge. Long story short, I came with an idea to stir fry these 2 vegetables, what a contrast in colour and flavour. One is better while another is sweet. They complement each other, trust me. I think this is an excellent dish for someone who does not or has not tried bitter melon. The sweetness from pumpkin reduces the bitterness from the melon. 

For a vegetarian option, you can omit the dried shrimps and substitute oyster sauce with a "vegetarian" version.

Skill Level: Easy
Serves: 4 - 6

INGREDIENTS:
  • 4 cups bite-sized Japanese pumpkin (Kabocha)
  • 2 medium size bitter melons
  • 4 tbsp dried shrimps, soaked for 10 minutes and rinsed
  • 2 tbsp cooking oil
  • 2 garlic cloves, minced
  • 2 slices ginger
  • 2 tbsp oyster sauce
  • 1 tbsp soy sauce
  • 1 1/2 cups water
  • 3 dried chili
METHOD: 
  1. Cut bitter melons into half lengthwise. Scoop out the seeds and soft white parts with a spoon. Cut into bite sizes and rinse
  2. In a pan, heat up cooking oil and fry minced garlic, ginger slices and dried shrimps till golden brown
  3.  Add in bitter melon and pumpkin. Stir for a minute
  4. Stir in the rest of the ingredients, cover and cook till boil
  5. Lower the heat and simmer for 20 minutes

Wednesday, August 7, 2013

Braised Pork Belly with Preserved Mustard Greens


After 4 months of no activity, I am glad to be back in action again. Cooking has been quite challenging with a baby crawling all over the house. My son has just celebrated his 1st birthday and am glad I now have some time on my own while he is in a daycare. Soon, I will be returning to work. Hence, I am now cooking like a storm and freeze some dishes for busy days ahead. The Chinese style Braised Pork Belly with Preserved Mustard Greens is in my cooking list this week. 

If you grew up in a Chinese family, you probably know this dish. It's called Mui Choy Khau Yoke, a traditional Hakka meat dish known with its rich fatty flavour, saltiness from preserved mustard greens and sweetness from sweet soy sauce. It is served in many Chinese restaurants here in Canada and our family's favourite dish.


Roasted Pork Belly
I grew up in a restaurant environment. My mother runs an Indonesian-Chinese restaurant in Indonesia and she serves this dish every Sunday. By noon, the Mui Choy Khau Yoke will be sold out. Making this dish is quite troublesome as the traditional method requires you to deep-fry the pork belly, then steam the pork slices with other ingredients for 3 to 4 hours. Personally, I do not have the time to spend hours in the kitchen, not when my 1 year old toddler running around the house (that's the reason why I have not updated this blog for quite a while). Cooking in the kitchen at my own time is now a precious moment. Since my son starts to crawl, I no longer have the time to cook and take notes of every recipe in the kitchen. My son is now in a daycare so I thought of cooking this dish and feature it on our blog.

In this post, I have revised my mother's traditional recipe to adapt to our busy lifestyle. Instead of making crispy pork belly from scratch, I buy a readily roasted pork belly from a Chinese grocery store. Also, I opt for braising this pork belly dish in a slow cooker instead of steaming for 3 to 4 hours. I could have used those hours to run errands and by the time I got home, voila! A delicious dish perfect for a family dinner. It is so moist and tender that it melts in your mouth. Best served with a bowl of steamed rice. I am confident that my mother approves this dish and be proud of me.

From left: Dried shrimps, shitake mushrooms, preserved mustard greens, dried squids

Skill Level: Easy
Serves: 8 - 10

INGREDIENTS:
  • 2 lbs of roasted pork belly, cut into 1 cm thickness
  • 1 bunch of Chinese preserved mustard greens
  • 9 dried shitake mushrooms
  • 1/2 cup dried shrimps
  • 1/4 cup dried squids, shredded
  • 4 tbsp cooking oil
  • 6 garlic cloves, minced
  • 1/4 cup oyster sauce
  • 3 tbsp light soy sauce
  • 2 tbsp sweet soy sauce (kecap manis)
  • 2 tbsp dark soy sauce
  • 2 1/2 cups water
  • ground white pepper
  • 1/2 cup Chinese cooking wine
METHOD: 
  1. Soak 1 bunch of Chinese preserved mustard greens for 2 hours. Rinse thoroughly and cut the greens into 1 cm length
  2. Meanwhile, soak dried shitake mushrooms with boiling water for 20 minutes. Once soft, slice mushrooms thinly
  3. In a separate bowl, soak dried shrimps and squids for 20 minutes. Rinse 
  4. In a small bowl, combine light soy sauce, dark soy sauce, sweet soy sauce (kecap manis), chinese cooking wine and water. Mix the sauce well with a spoon 
  5. Heat up cooking oil in a pan. Once hot, saute minced garlic till golden brown
  6. Add in the preserved mustard greens, dried shrimps, squids and shitake mushrooms. Cook for 5 minutes or until fragrant
  7. Mix in the sauce, stir and cook till wait. Lower heat and simmer for another 15 minutes
  8. In a slow cooker, arrange roasted pork belly slices evenly
  9. Add in the cooked ingredients with its sauce and cook for 3 hours